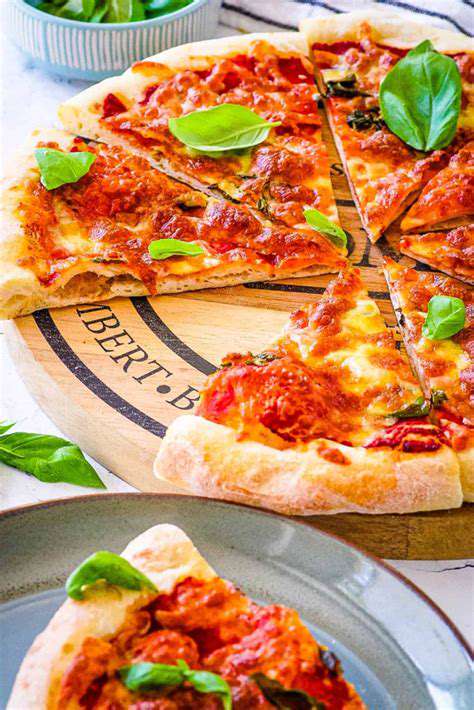
Homemade Pizza Dough: The Ultimate Guide for Beginners
Understanding the Ingredients
Great dough starts with understanding each component's role. Flour forms the foundation - higher protein varieties create chewier textures ideal for pizza. Water activates the flour's gluten potential while yeast works its magic to create those coveted air pockets. Even salt plays a crucial role, enhancing flavor while regulating yeast activity.
The type of flour makes a noticeable difference. Bread flour gives superior structure compared to all-purpose. Measure carefully - even small variations in flour or water can throw off the final product.
Mixing the Dough: The Initial Steps
Combine dry ingredients first, making sure your yeast is alive and ready. Test it by mixing with warm water - if it foams, you're good to go. Add water gradually, mixing until a shaggy mass forms. Don't worry about stickiness at this stage - it's perfectly normal.
Kneading the Dough: Developing the Gluten
This is where the magic happens. Kneading develops gluten strands that give dough its stretch. Work on a lightly floured surface, using the heel of your hand to push and fold. After 8-10 minutes, you'll feel the texture change from sticky to smooth and elastic.
Adjust consistency as needed - a sprinkle of flour for stickiness or drops of water if too dry. The dough should feel supple and spring back when pressed.
Allowing the Dough to Rise: The First Proof
Let your kneaded dough rest in an oiled bowl, covered, in a warm spot. Watch for it to double in size - this usually takes 1-1.5 hours. The ideal spot? Near a warm oven or in a turned-off microwave with a cup of hot water.
Don't rush this step - proper rising develops flavor and texture. But don't overproof either, or your dough may collapse.
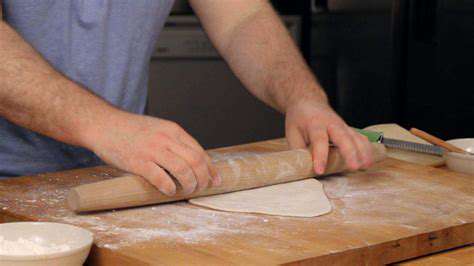
Shaping and Preparing the Dough for Baking
After rising, gently deflate the dough to redistribute the yeast. Divide and shape carefully - use flour to prevent sticking but don't overdo it. Let shaped dough rest briefly before topping; this relaxes the gluten for easier stretching.
Preheat your oven thoroughly - a hot oven (ideally with a pizza stone) creates that perfect crisp crust. Different ovens vary, so learn yours and adjust accordingly.
Tips and Tricks for Mastering Homemade Pizza Dough
Organizing Your Space for Efficiency
A well-planned workspace makes pizza night smoother. Keep essentials within easy reach - flour, olive oil, and tools should have dedicated spots. Clear counter space before starting gives you room to work comfortably.
Invest in quality storage containers for ingredients. Clear ones let you see contents at a glance, while matching sets create visual order. Label containers for frequently used flours and grains.
Smart Storage Solutions for Small Spaces
Even tight kitchens can accommodate pizza-making supplies. Stackable containers maximize vertical space, while drawer dividers keep small tools organized. A rolling cart can provide extra workspace that tucks away when not needed.
Decluttering for Better Focus
Streamline your tools to the essentials. You really only need a good mixing bowl, measuring tools, and a reliable rolling pin. Donate duplicate or unused items - a minimalist approach reduces stress and cleanup time.
Maintaining an Efficient Workspace
Clean as you go to prevent floury messes from accumulating. Wipe surfaces between steps and immediately wash sticky tools. A small trash bowl on the counter collects scraps for easy disposal.
Leveraging Technology
Use apps to track recipes and timers. Smart scales ensure perfect measurements every time. Consider a thermometer to monitor water temperature for ideal yeast activation.
- Instant Pot Basics: Quick & Easy Pressure Cooker Meals
- Pantry Organization Hacks: Declutter Your Kitchen
- High Protein Breakfast Ideas: Fuel Your Day
- Discovering Korean BBQ: Essential Marinades and Grilling Tips
- High Fiber Diet Benefits: Recipes for Digestive Health
- How to Store Potatoes Long Term: Cool and Dark
- Simple Beef Recipes: Versatile and Delicious
- Discovering Indian Vegetarian Dishes: Flavorful Curries
- How to Store Apples Long Term: Cool and Dark
- Authentic Mexican Street Tacos: Carnitas Recipe
- Exploring Chinese New Year Foods: Symbolism and Recipes
- Quick & Easy Breakfast Muffins: On the Go Options