Storing Root Vegetables Long Term: Cellar Tips
Pest Management
Nothing ruins a winter's worth of food faster than rodents or insects finding their way into your storage. Prevention beats extermination every time – a single mouse can contaminate an entire bin of potatoes overnight.
I combine several deterrents for best results: metal mesh over all openings, diatomaceous earth around the perimeter, and cotton balls soaked in peppermint oil placed strategically. These natural methods work better than toxic chemicals that could taint your food.
Light Control
While some light helps when checking on stored produce, constant exposure causes several issues. Potatoes develop bitter solanine when exposed to light, while carrots lose their vibrant color and sweetness.
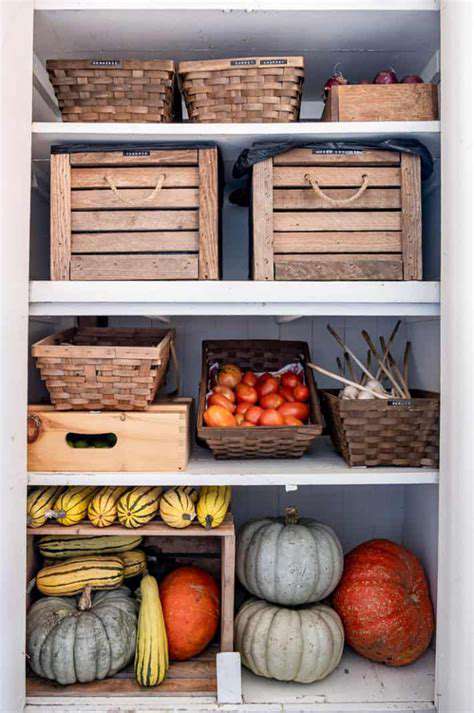
Blackout curtains over any windows block light effectively. For open shelving, I use heavy burlap sacks that can be lifted for inspection but otherwise keep vegetables in complete darkness. This simple solution prevents light-related quality loss.
Storage Organization and Rotation
Chaotic storage leads to forgotten produce and unnecessary waste. Grouping by vegetable type and expected storage life makes inventory management simple and prevents cross-contamination between different crops.
I use a color-coded tag system – green for short-term (beets, turnips), yellow for medium (carrots, parsnips), and red for long-term storage (potatoes, onions). This visual cue reminds me which bins to check first during weekly inspections.
Preparing Root Vegetables for Long-Term Storage
Prepping for Storage
How you handle roots at harvest determines their keeping quality. Never wash vegetables before curing – that moisture trapped between leaves and roots invites rot during the critical drying period.
I use the two-step selection method: first cull damaged roots at harvest, then do a second inspection after curing when any hidden bruises become apparent. This double-check system ensures only the most durable specimens make it into long-term storage.
Cleaning Techniques
Post-cure cleaning requires a gentle touch. Think of it like handling antique books – you want to remove surface debris without damaging the protective outer layers nature provided. A soft toothbrush works wonders for intricate root shapes.
For vegetables like celeriac with deep crevices, I use a blast of air from a handheld bulb syringe (the kind for cleaning camera lenses) to dislodge stubborn dirt before final rinsing. This prevents abrasive scrubbing that breaks the skin.
Drying and Air Circulation
The drying process deserves more attention than most gardeners give it. Surface moisture evaporates quickly, but capillary action draws water from interior tissues for days after washing. I spread roots on wire racks with fans circulating air at room temperature for 48 hours before storage.
Pro tip: Place a small digital hygrometer near drying vegetables. When the humidity reading stabilizes for 12 hours straight, you know evaporation has completed and storage can begin.
Choosing the Right Storage Method
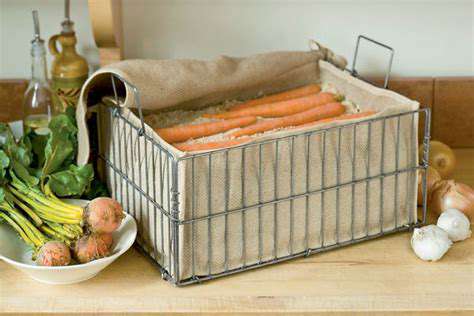
Not all roots play nice together in storage. Potatoes and onions emit gases that make each other spoil faster, while carrots and apples create a flavor exchange few people enjoy. I use a modified sandbox system with separate compartments lined with slightly damp peat moss for vegetables needing high humidity.
The key is matching the storage medium to the vegetable's natural habitat. Parsnips that grow in loose soil store best in vermiculite, while rutabagas from compacted earth prefer firmer packing materials like slightly moist sawdust.
Temperature and Humidity Control
Understanding plant physiology helps optimize storage conditions. Roots continue respiring after harvest – cool temperatures slow this process, while proper humidity prevents desiccation. I track both parameters with a combo thermometer/hygrometer that records highs and lows.
For those without cellars, an unheated spare room with insulated containers works surprisingly well. I've successfully stored carrots for months in Styrofoam coolers with ventilation holes, adding frozen gel packs during warm spells.
Maintaining and Monitoring Your Root Vegetable Storage
Proper Storage Environment
The storage space itself requires as much attention as the vegetables. I've found that temperature stratification creates microclimates – the floor stays coldest while upper shelves remain several degrees warmer. Use this to your advantage by placing less cold-tolerant vegetables higher up.
For humidity control, nothing beats the old-fashioned wet wall technique. A burlap curtain suspended over one wall with the bottom in a water trough creates evaporative cooling while maintaining high humidity. Adjust the water level to fine-tune moisture levels.
Choosing the Right Storage Containers
Container selection makes a bigger difference than most people realize. I avoid wood because it harbors mold spores, instead using food-grade plastic bins with custom-drilled ventilation patterns. The holes should comprise about 5% of the surface area for optimal airflow.
For small quantities, I repurpose milk crates lined with landscape fabric. The fabric breathes while containing any decay that might develop. This system makes it easy to pull individual crates for inspection without disturbing the entire storage.
Preparing Root Vegetables for Storage
The initial prep work pays dividends months later. I've developed a triple dry method: first air dry after harvest, second dry after curing, and final dry after cleaning. Between each stage, the vegetables rest on racks with good airflow. This meticulous approach eliminates hidden moisture pockets that cause storage rot.
For extra protection, I dust certain vegetables with food-grade diatomaceous earth. This natural powder controls surface insects without chemicals and helps wick away residual moisture. A light coating goes a long way in preventing storage pests.
Preventing Pests and Diseases
Pest prevention starts with exclusion. I seal my storage area with copper mesh (rodents hate chewing it) and install door sweeps with tight seals. Sticky traps placed strategically provide early warning of insect incursions.
For organic pest control, I rely on beneficial nematodes applied to the storage area before filling it with vegetables. These microscopic predators target insect larvae without harming humans or plants. Combined with weekly inspections, this creates a robust defense system.
Sorting and Organizing for Easy Access
Good organization reduces handling damage. I arrange vegetables by access frequency – items used weekly go in front, while long-storage varieties occupy the back. Each container gets a dated tag noting when contents should be checked.
For family storage, I created a menu board showing what's available. This visual inventory prevents forgotten vegetables languishing in dark corners. Kids can pick what they want by moving clothespins marked with their names – making storage management a family activity.
Monitoring and Maintaining Storage Conditions
Consistent monitoring prevents small problems from becoming disasters. I keep a logbook recording temperature, humidity, and any issues found during inspections. Over time, patterns emerge showing which vegetables store best under which conditions.
The most important tool? Your nose. A quick sniff test when opening storage often detects problems before they're visible. That faint earthy smell of healthy storage should never include sour, musty, or ammonia notes indicating trouble.